Adding Another Account to Your Profile
Some users need to work with more than one company account. Instead of asking someone to set that up for you, you can request the extra account yourself from your Profile page. Once the request is approved, the new account shows up alongside your existing one.
:::info Behind the scenes This walkthrough was captured against the UAT site. See the test instructions it was driven from, and the test results recorded during the run. :::
This guide walks through that process from start to finish.
Before you begin: You're already signed in to the Regal Rexnord site and you're looking at your dashboard. You'll also need the account number you want access to — in this example, we're adding account H5230420.
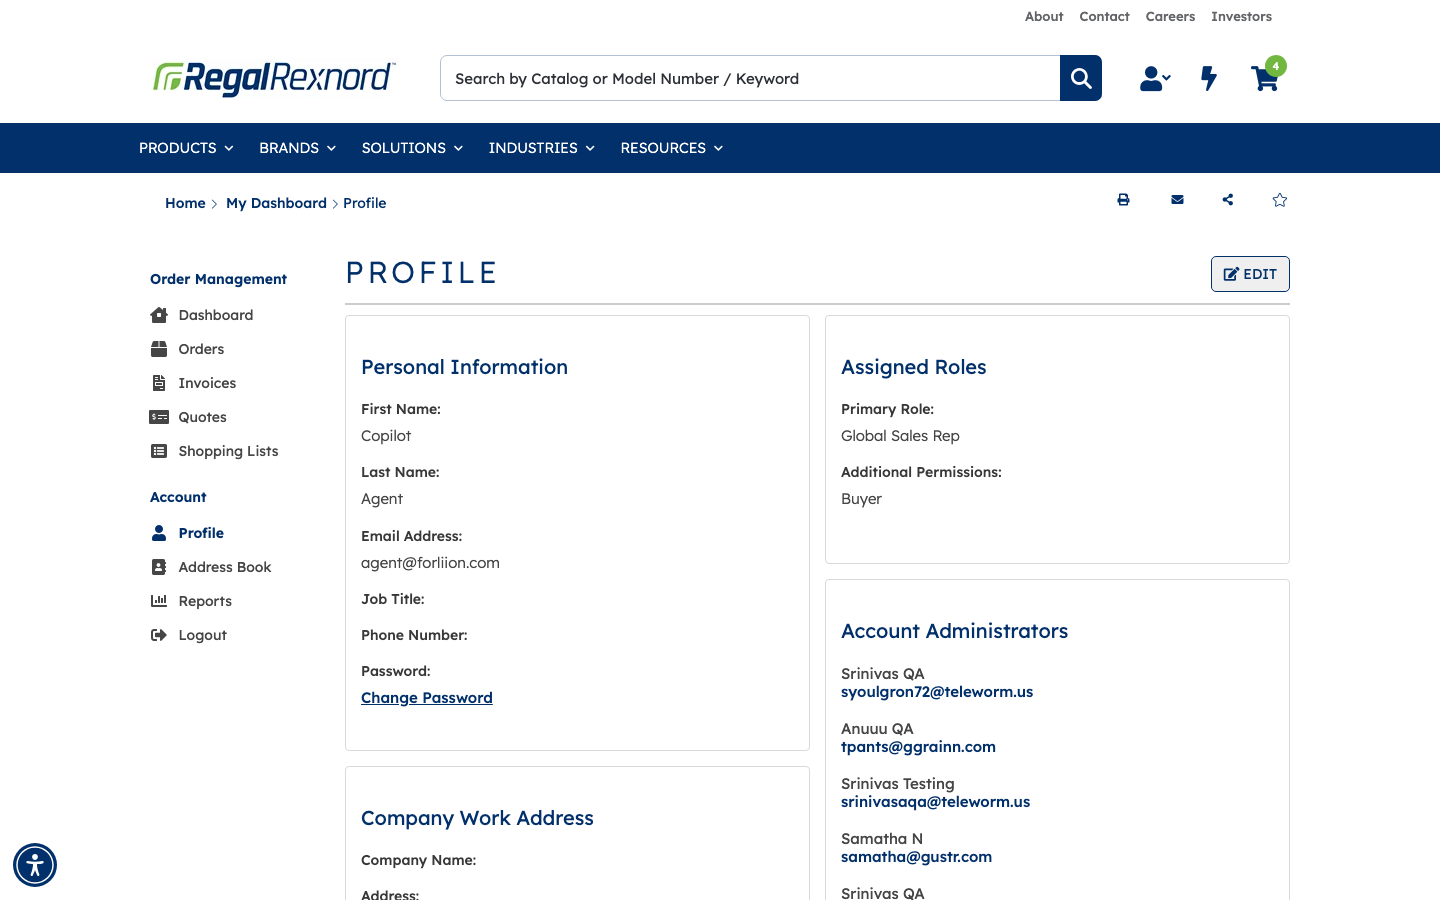
Step 1 — Go to your Profile page
From the top of the page, open the Account menu and choose Profile.
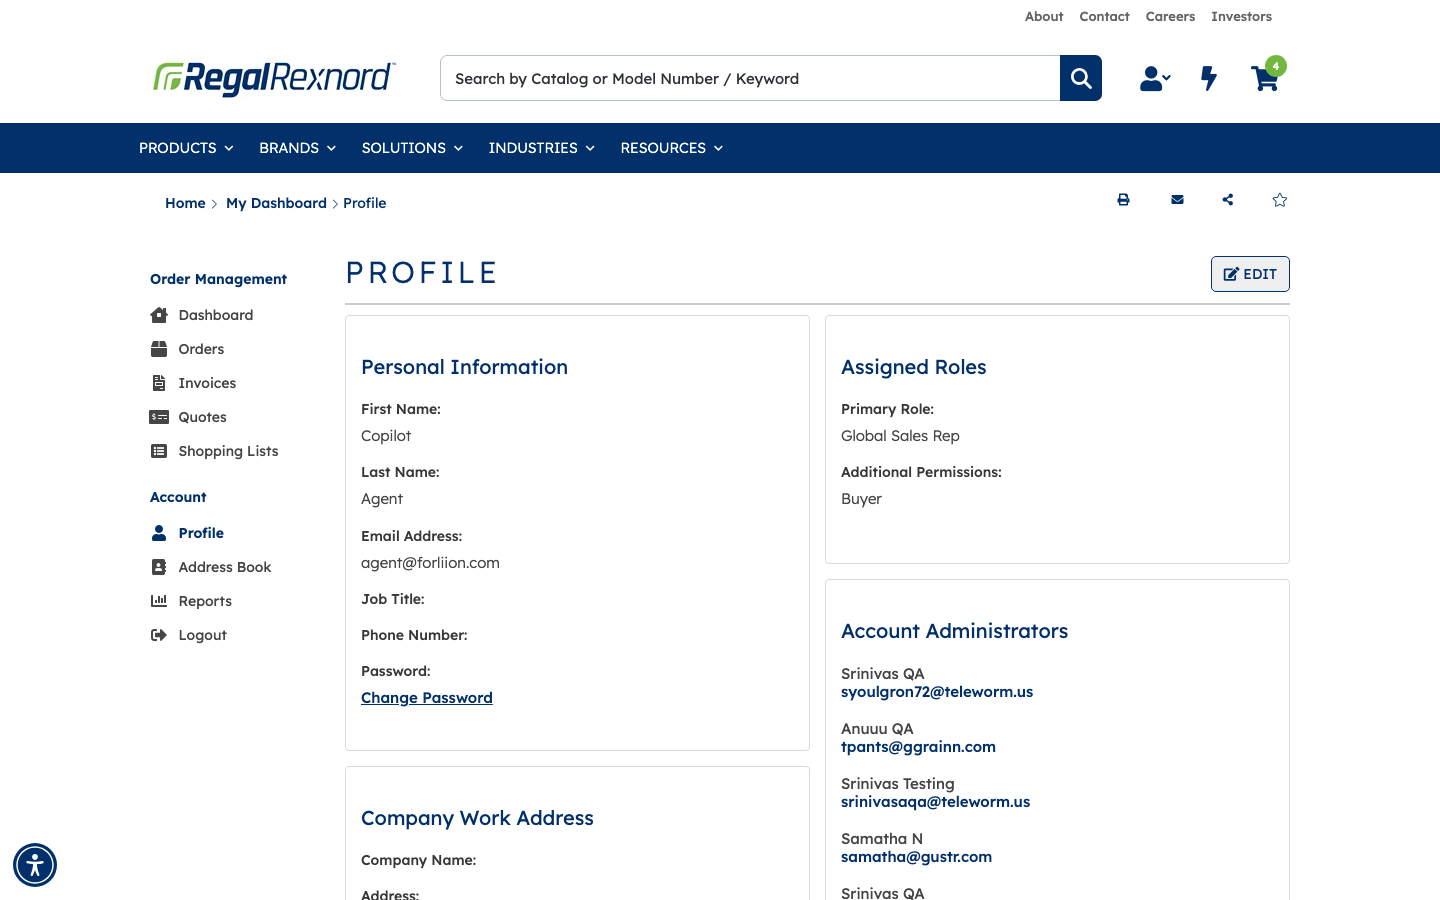
Take a look at the Assigned Roles panel on this page. It shows what kind of access you have — in this example, the role is Global Sales Rep. This is the level of access that will carry over to the new account.
Step 2 — See which accounts you have today
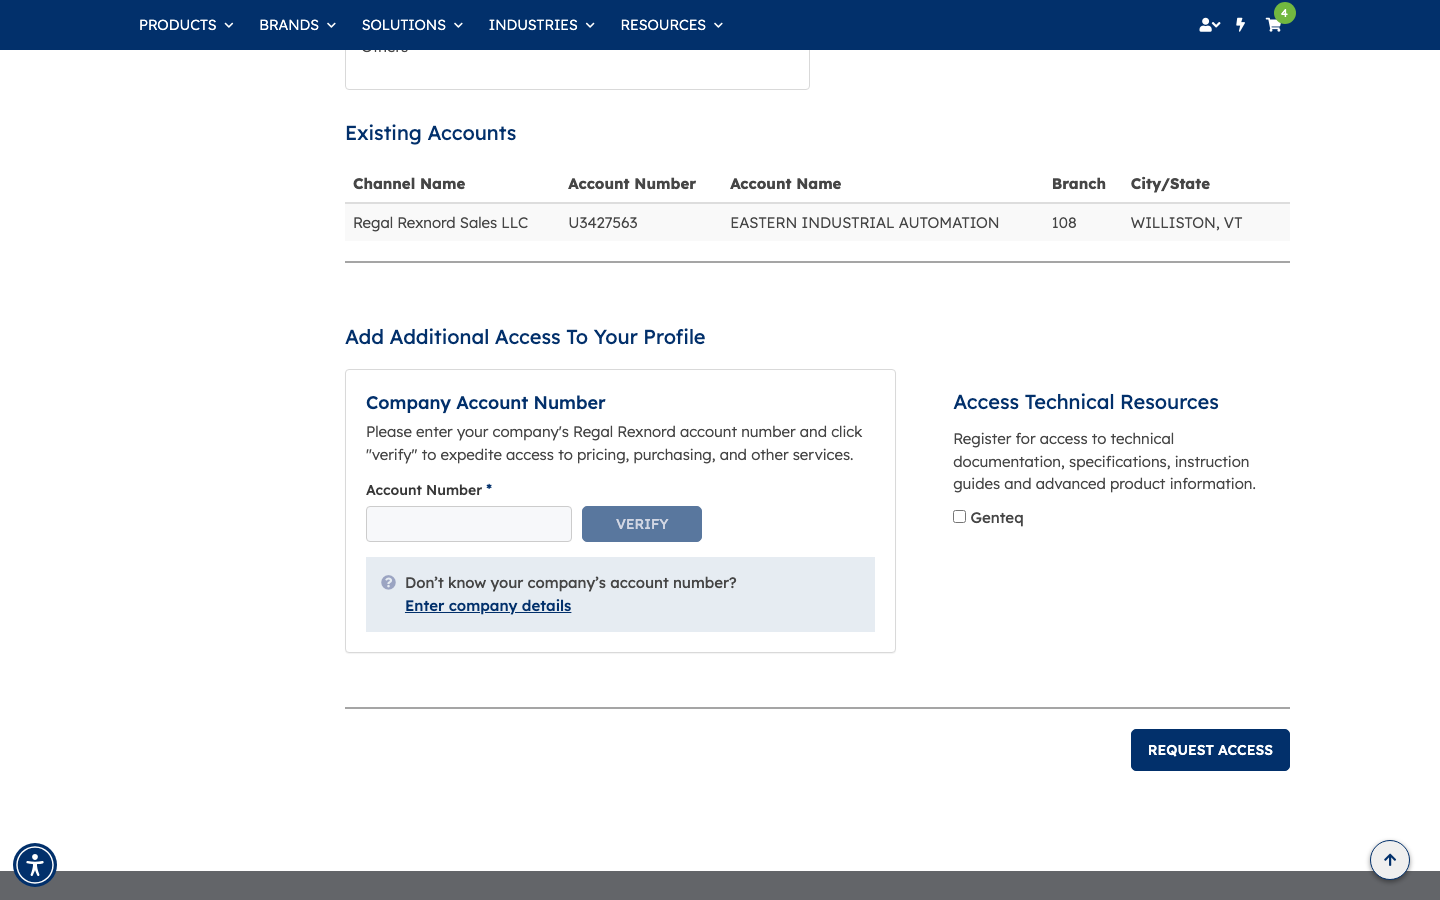
Scroll down the Profile page until you reach the Existing Accounts table. This is the list of every account you can currently work with.
Right now there's only one account in the list:
| Channel Name | Account Number | Account Name | Branch | City/State |
|---|---|---|---|---|
| Regal Rexnord Sales LLC | U3427563 | EASTERN INDUSTRIAL AUTOMATION | 108 | WILLISTON, VT |
The account we want to add, H5230420, isn't there yet. That's what we're about to fix.
Step 3 — Enter the account number you want
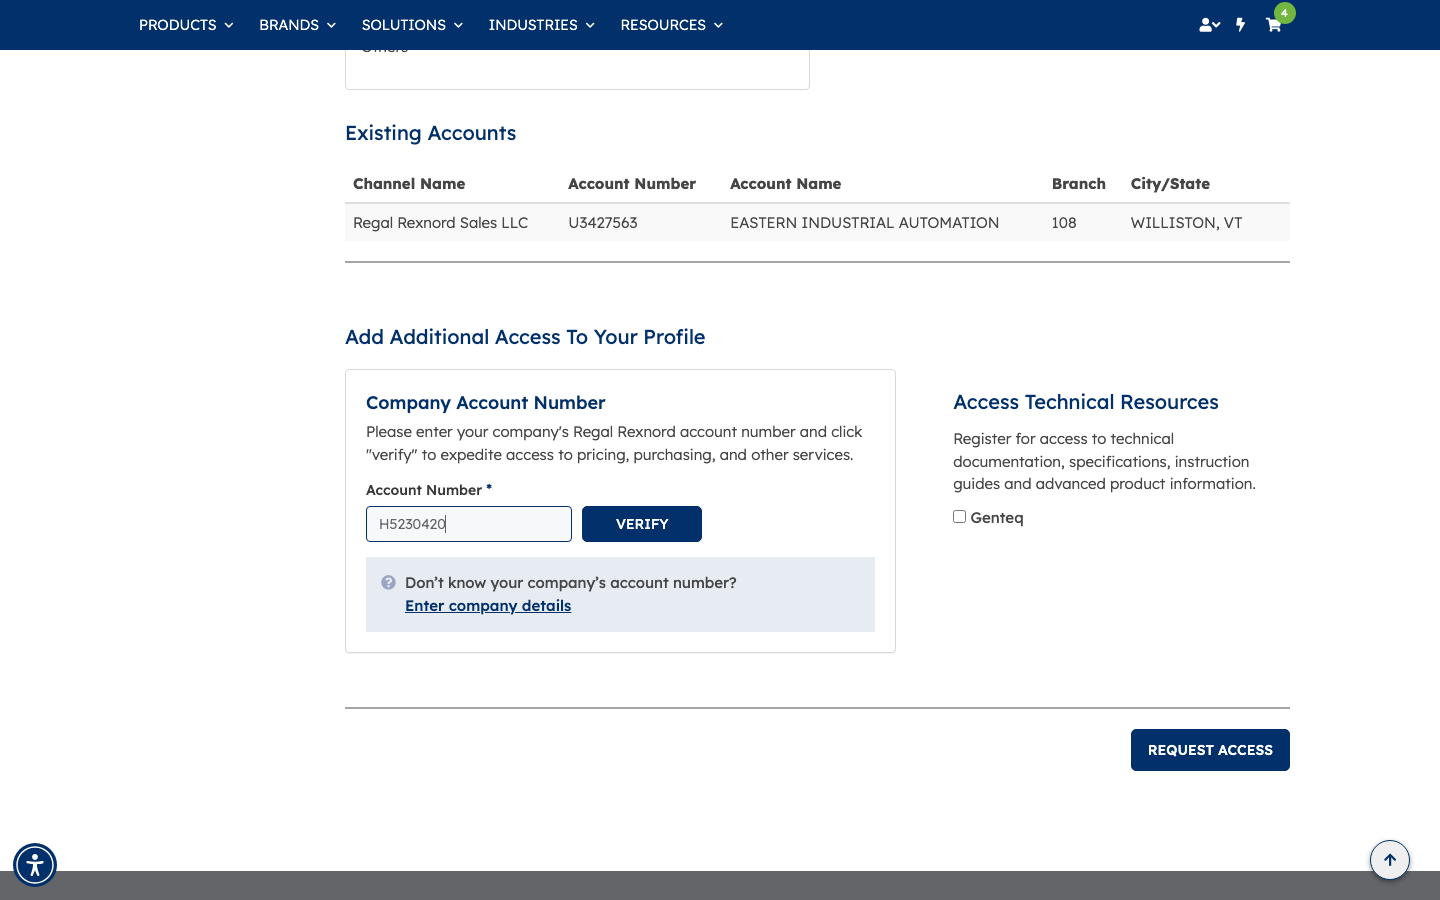
Just below the Existing Accounts table is a section called Add Additional Access To Your Profile. Type the account number into the Company Account Number field.
As soon as you start typing, the VERIFY button becomes available.
Step 4 — Verify the account
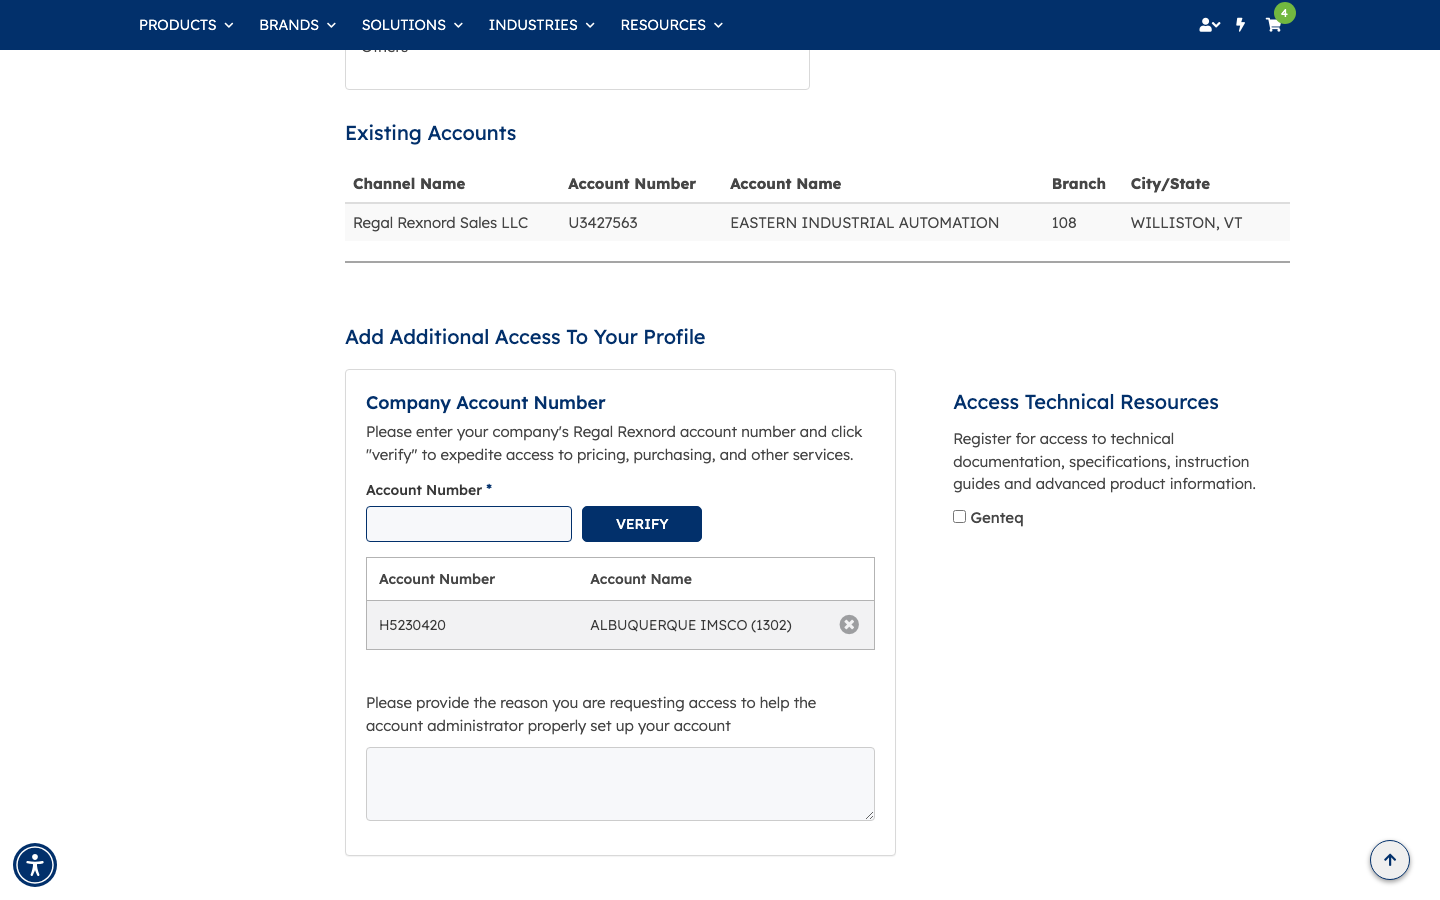
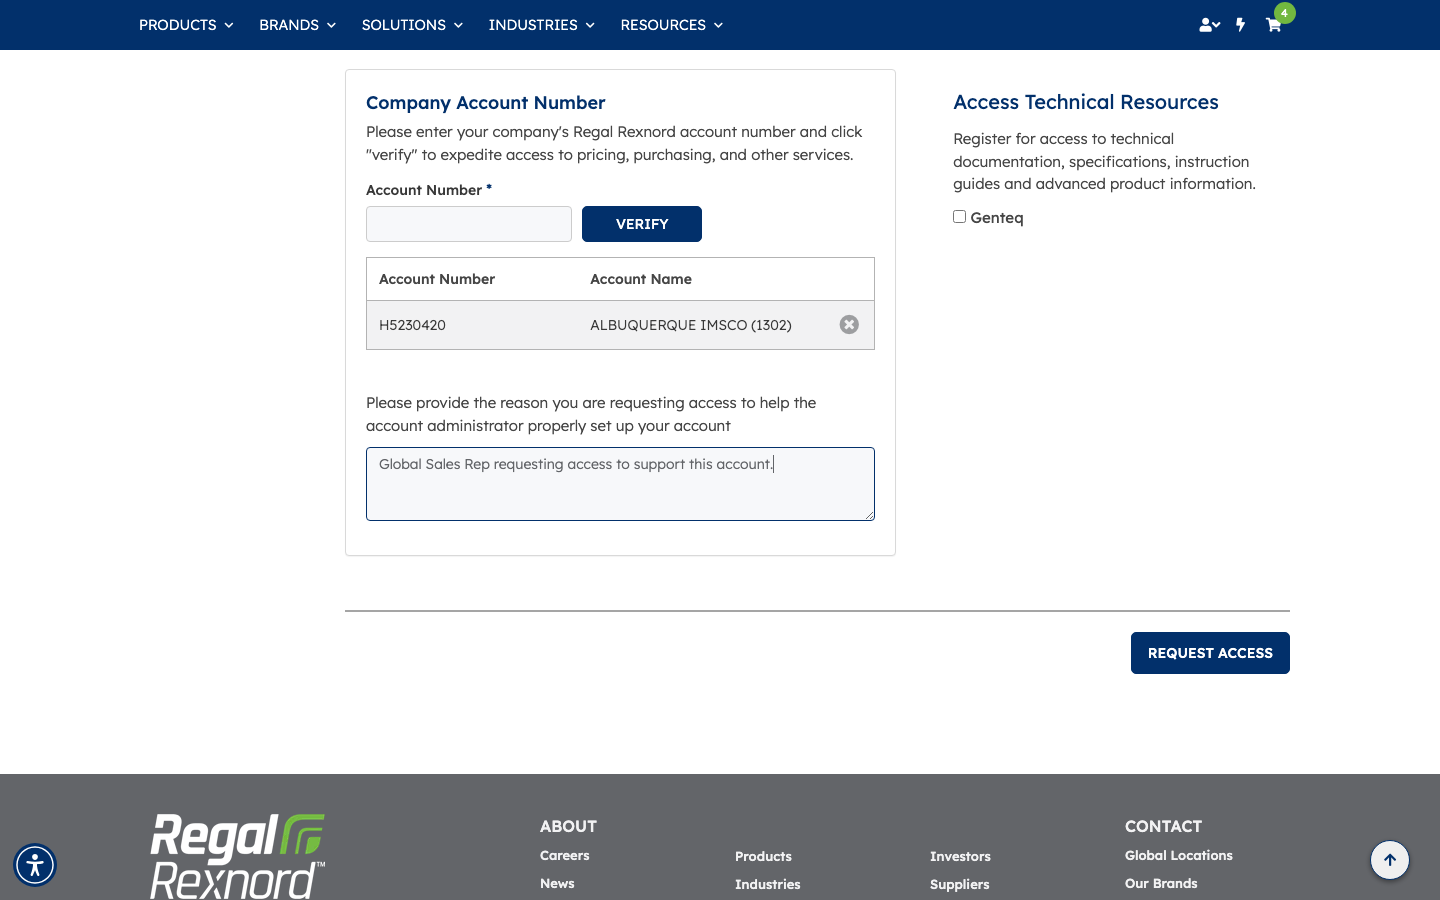
Click VERIFY. The site looks up the account number and shows you the company name so you can confirm you've got the right one — here it comes back as H5230420 — ALBUQUERQUE IMSCO (branch 1302).
A reason field also appears. This lets you explain why you need access, which helps the account administrator review your request.
Step 5 — Explain why and submit
Fill in a short reason for the request, then click REQUEST ACCESS.
Step 6 — Confirmation
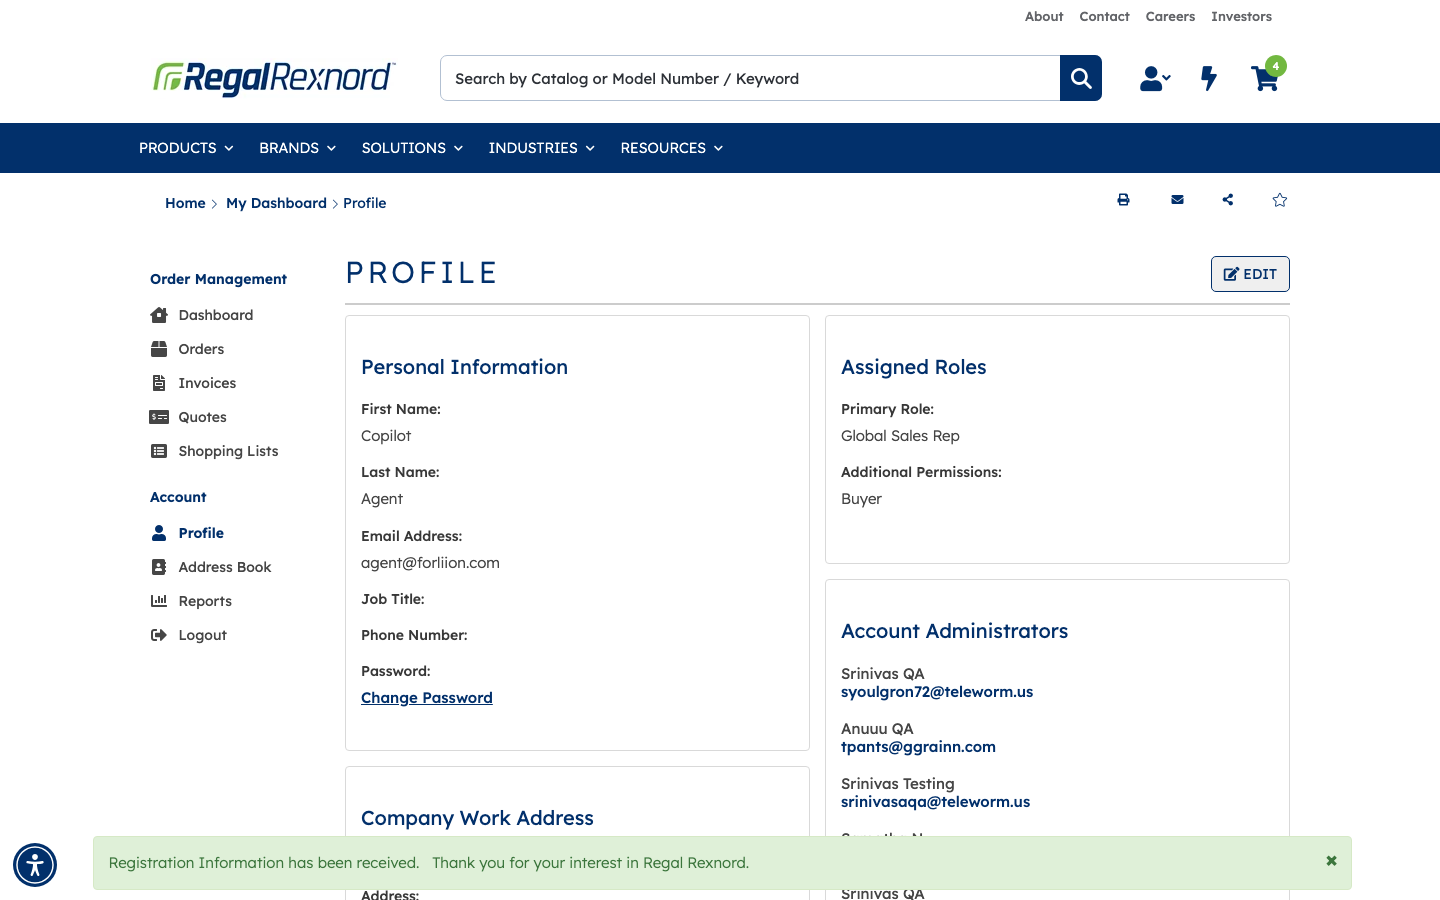
You'll be returned to your Profile page with a confirmation message at the top:
"Registration Information has been received. Thank you for your interest in Regal Rexnord."
That's your signal the request went through successfully.
Step 7 — Check that the account was added
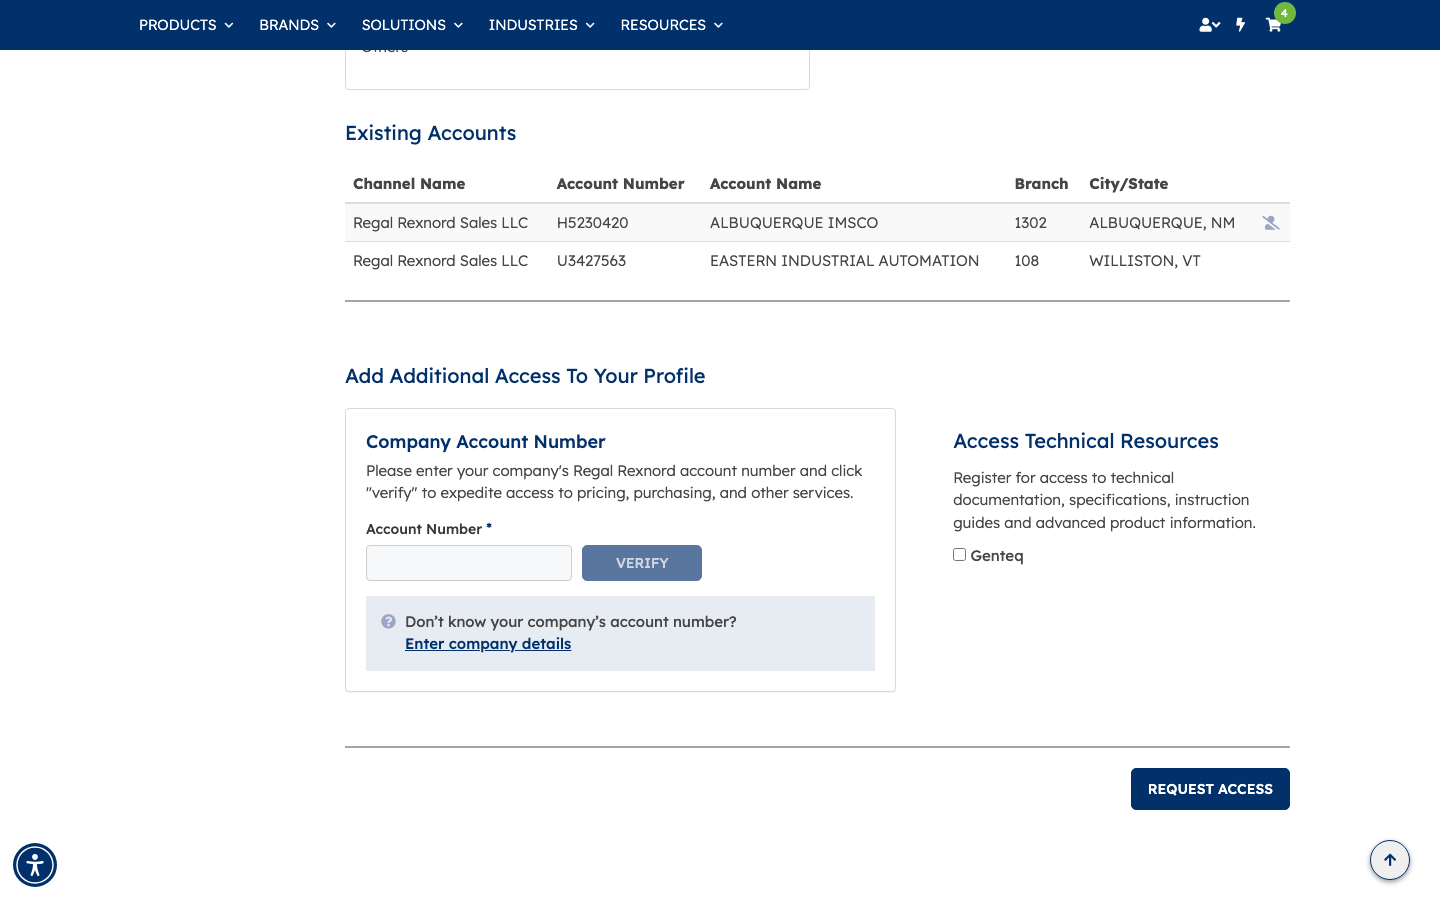
Refresh the Profile page and scroll back down to Existing Accounts. The new account now appears in the list alongside your original one:
| Channel Name | Account Number | Account Name | Branch | City/State |
|---|---|---|---|---|
| Regal Rexnord Sales LLC | H5230420 | ALBUQUERQUE IMSCO | 1302 | ALBUQUERQUE, NM |
| Regal Rexnord Sales LLC | U3427563 | EASTERN INDUSTRIAL AUTOMATION | 108 | WILLISTON, VT |
Scrolling up to Assigned Roles confirms your access level hasn't changed — you're still a Global Sales Rep, and that role now applies to both accounts.
That's it. You can now switch between accounts and work with either one, using the same permissions you already had.