Using the Onboarding Dashboard
The Onboarding Dashboard gives you a single place to track how customer accounts are being brought onto the platform — from the files that load account data, to the jobs that process them, to the go-live dates you need to manage. If you're responsible for customer onboarding, this is your home base.
:::info Behind the scenes This walkthrough was captured against the UAT site. See the test instructions it was driven from, and the test results recorded during the run. :::
Before you begin: You're already signed in to your account. Navigate to the Onboarding Dashboard using the link provided by your administrator or the main navigation menu.
Step 1 — Orient yourself with the dashboard summary
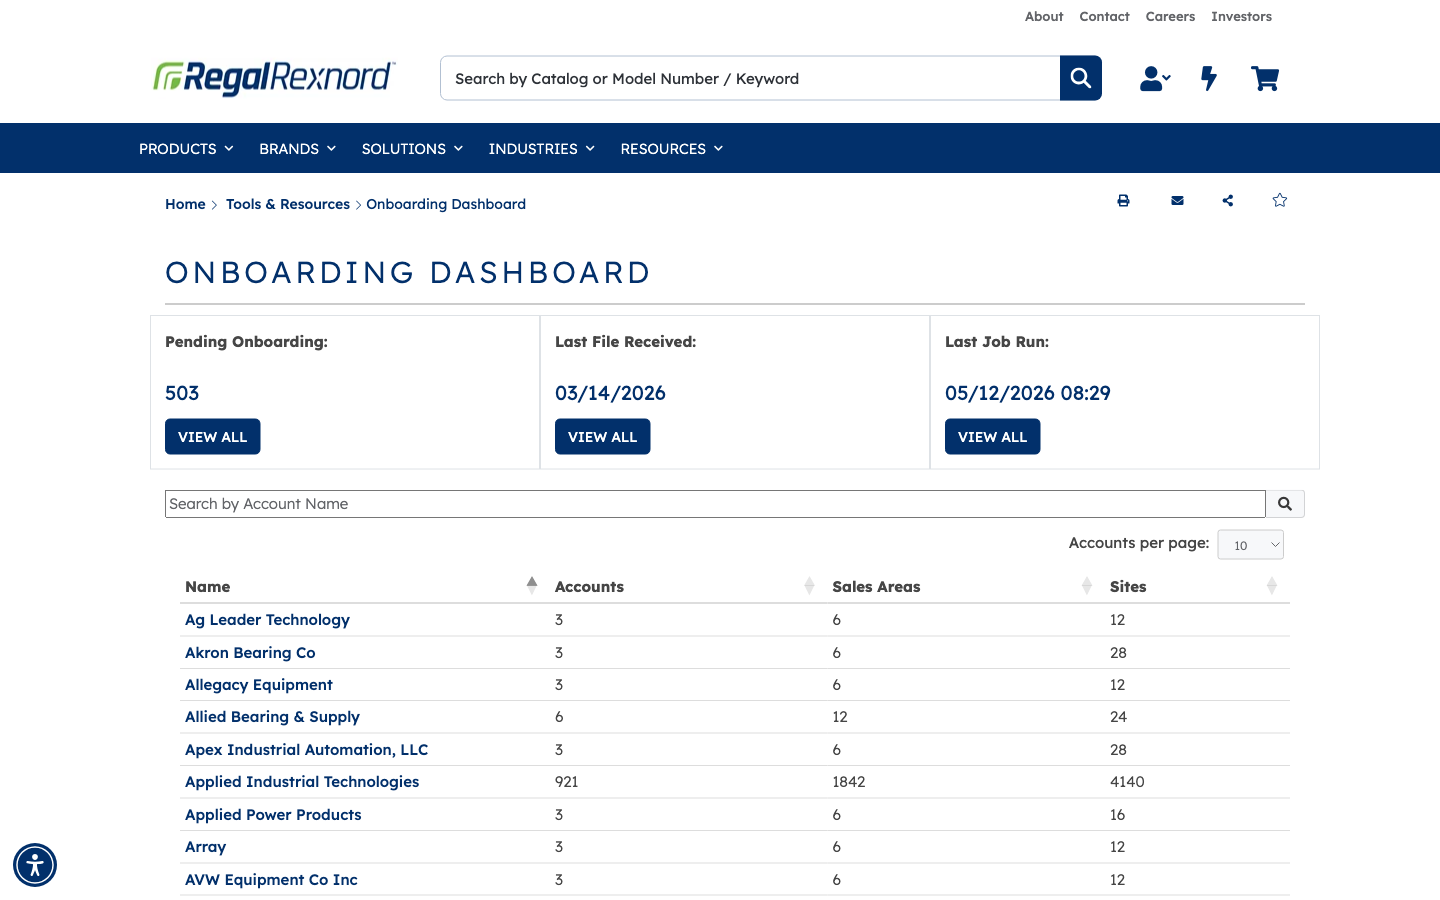
When the Onboarding Dashboard opens, three summary tiles appear at the top of the page:
- Pending Onboarding — the number of accounts that have not yet completed the onboarding process.
- Last File Received — the date and time the most recent account data file was uploaded.
- Last Job Run — the date and time the most recent processing job was executed.
Below the summary tiles, the Account table lists every parent account being onboarded, with columns for Name, Accounts, Sales Areas, and Sites.
Step 2 — Find a specific account using the search filter
If your account list is long, use the search box above the table to narrow it down. Type part of an account name — for example, Ag Leader Technology — and the table immediately filters to show only matching rows.
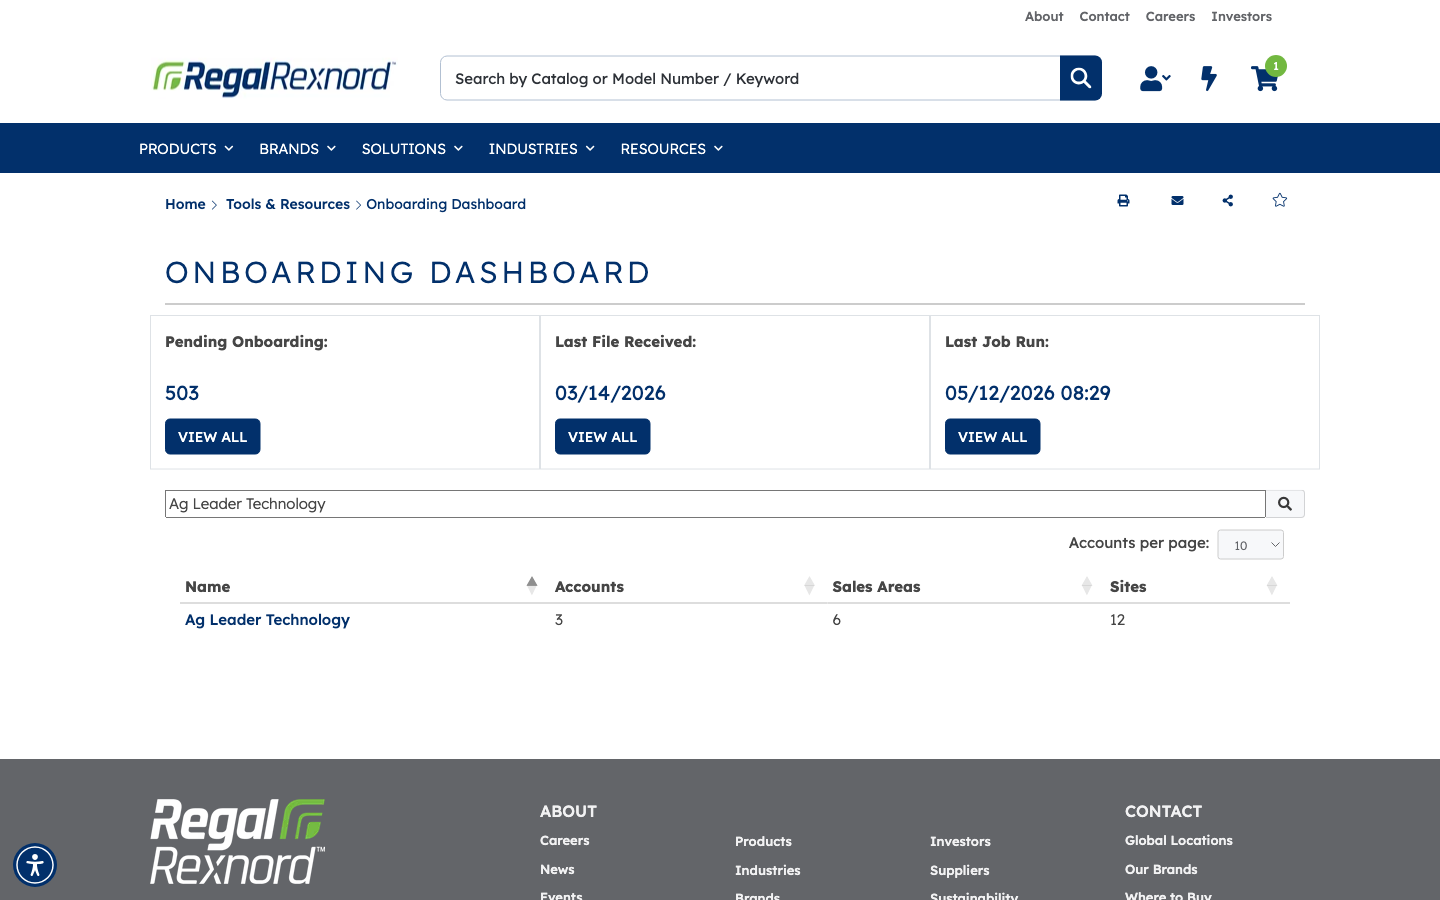
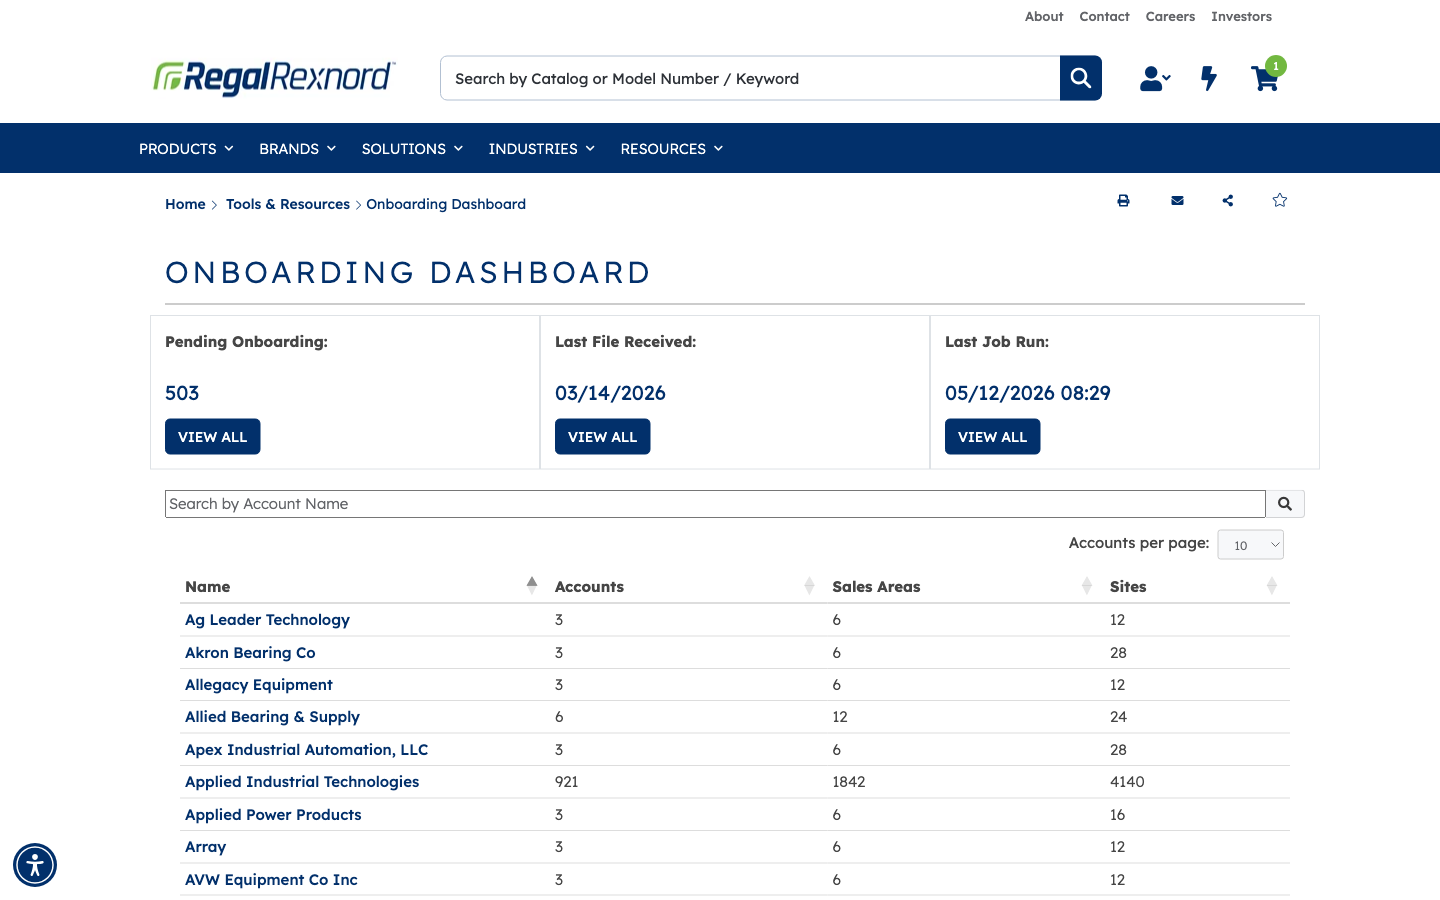
To return to the full list, clear the search box. The table resets to the first page of all accounts (10 rows per page).
Step 3 — Review account details
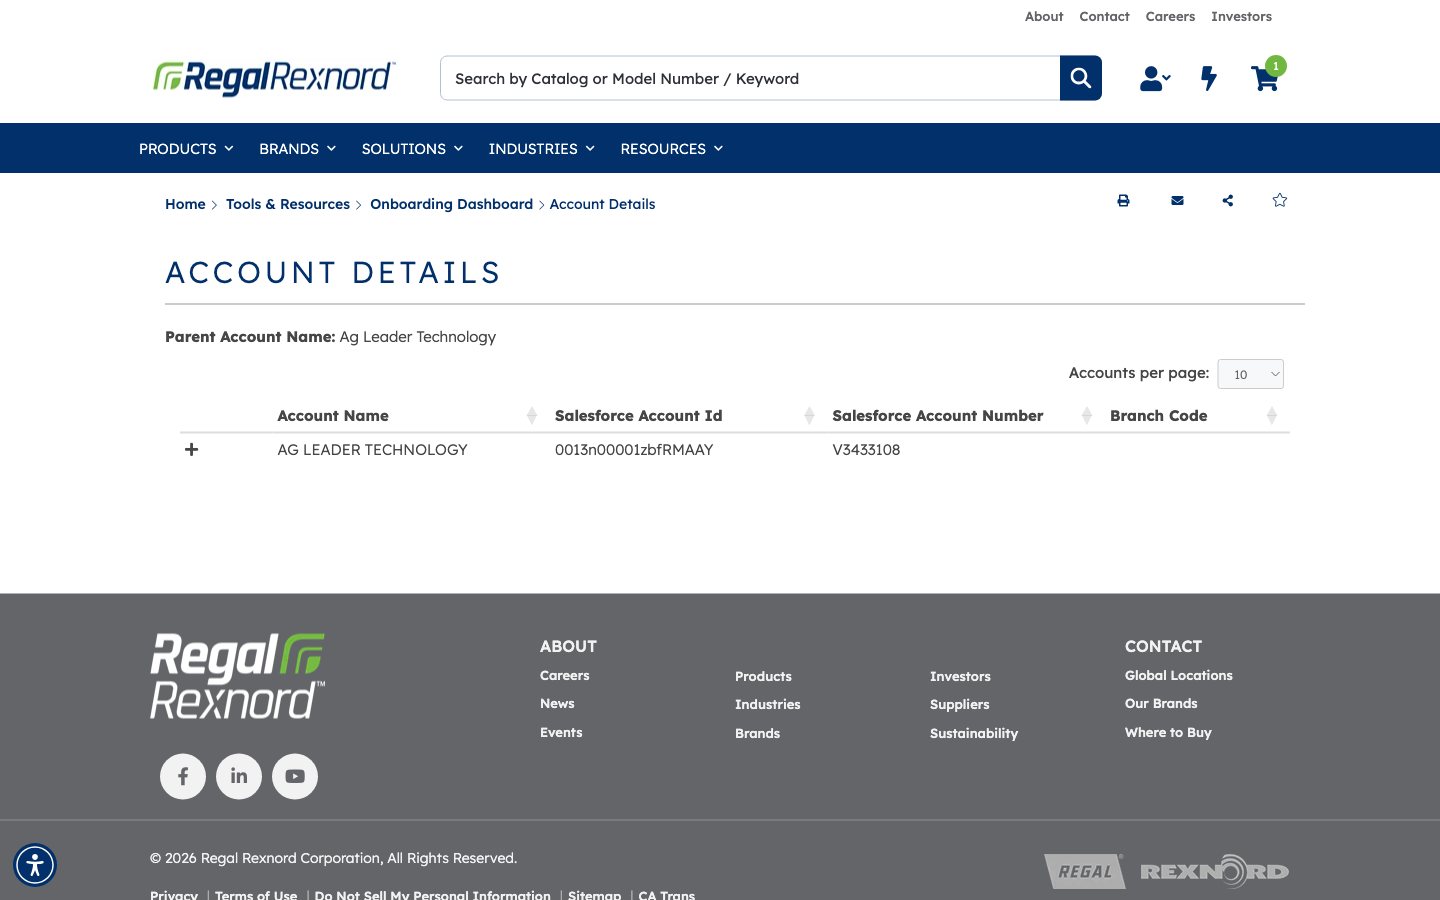
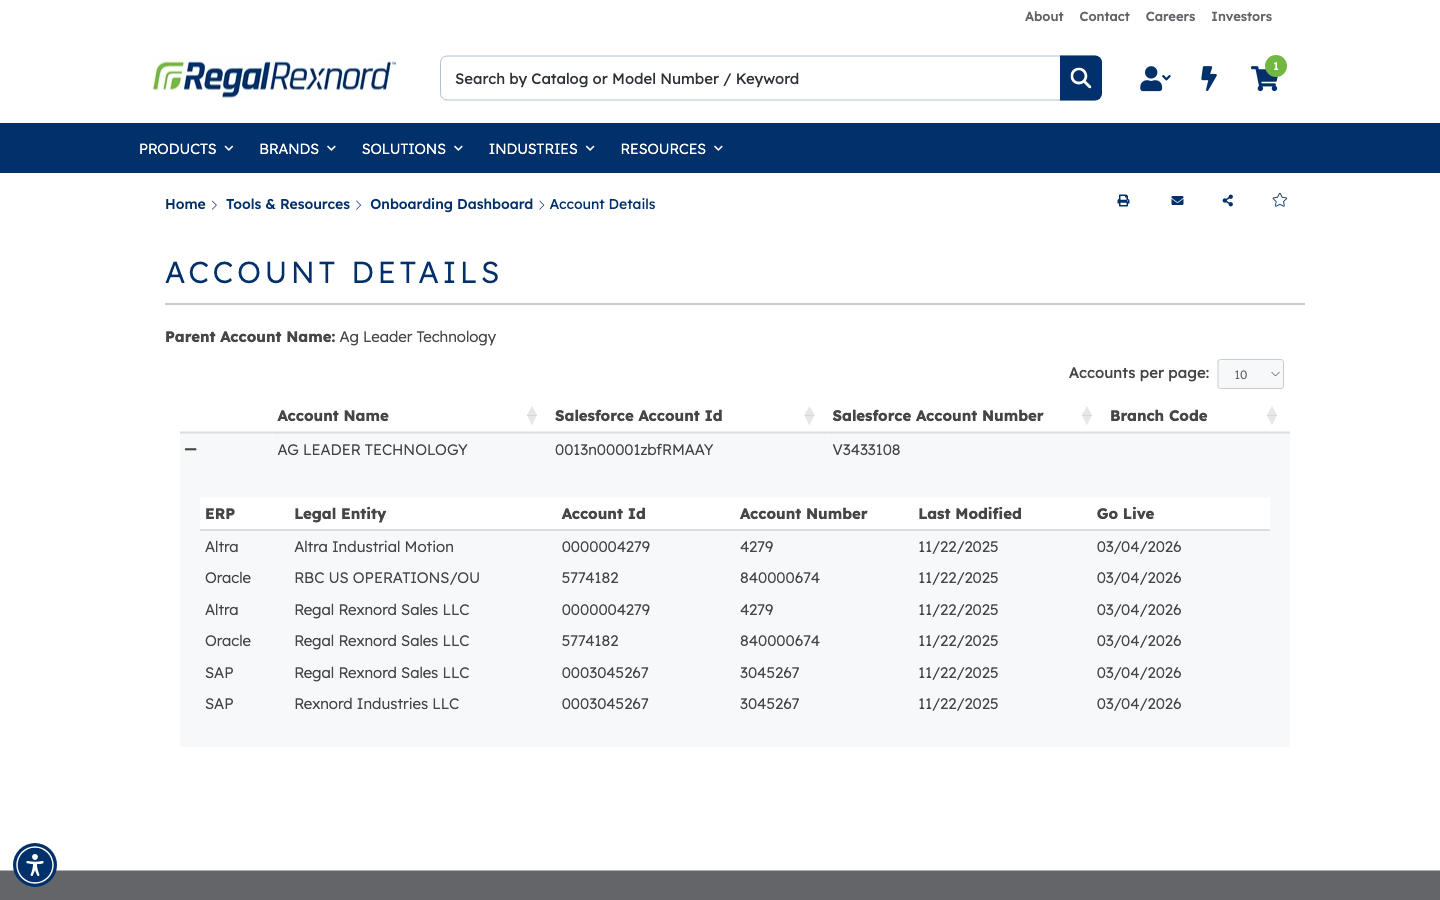
Click any account name in the table to open its detail view. You'll see the parent account name (for example, Ag Leader Technology) along with key reference columns:
| Column | What it tells you |
|---|---|
| Account Name | The customer's legal or trading name |
| Salesforce Account Id | The unique ID in your CRM |
| Salesforce Account Number | The CRM account number |
| Branch Code | The branch responsible for this account |
Step 4 — Expand a row for deeper onboarding information
Within the account detail view, click a row to expand it. The expanded row reveals additional information about how the account is set up:
| Field | What it tells you |
|---|---|
| Legal Entity | The entity under which the account is registered |
| Account Id / Account Number | Internal identifiers for the account |
| Last Modified | When the account record was last updated |
| Go Live | The date the account is scheduled to become active |
Step 5 — Check File History
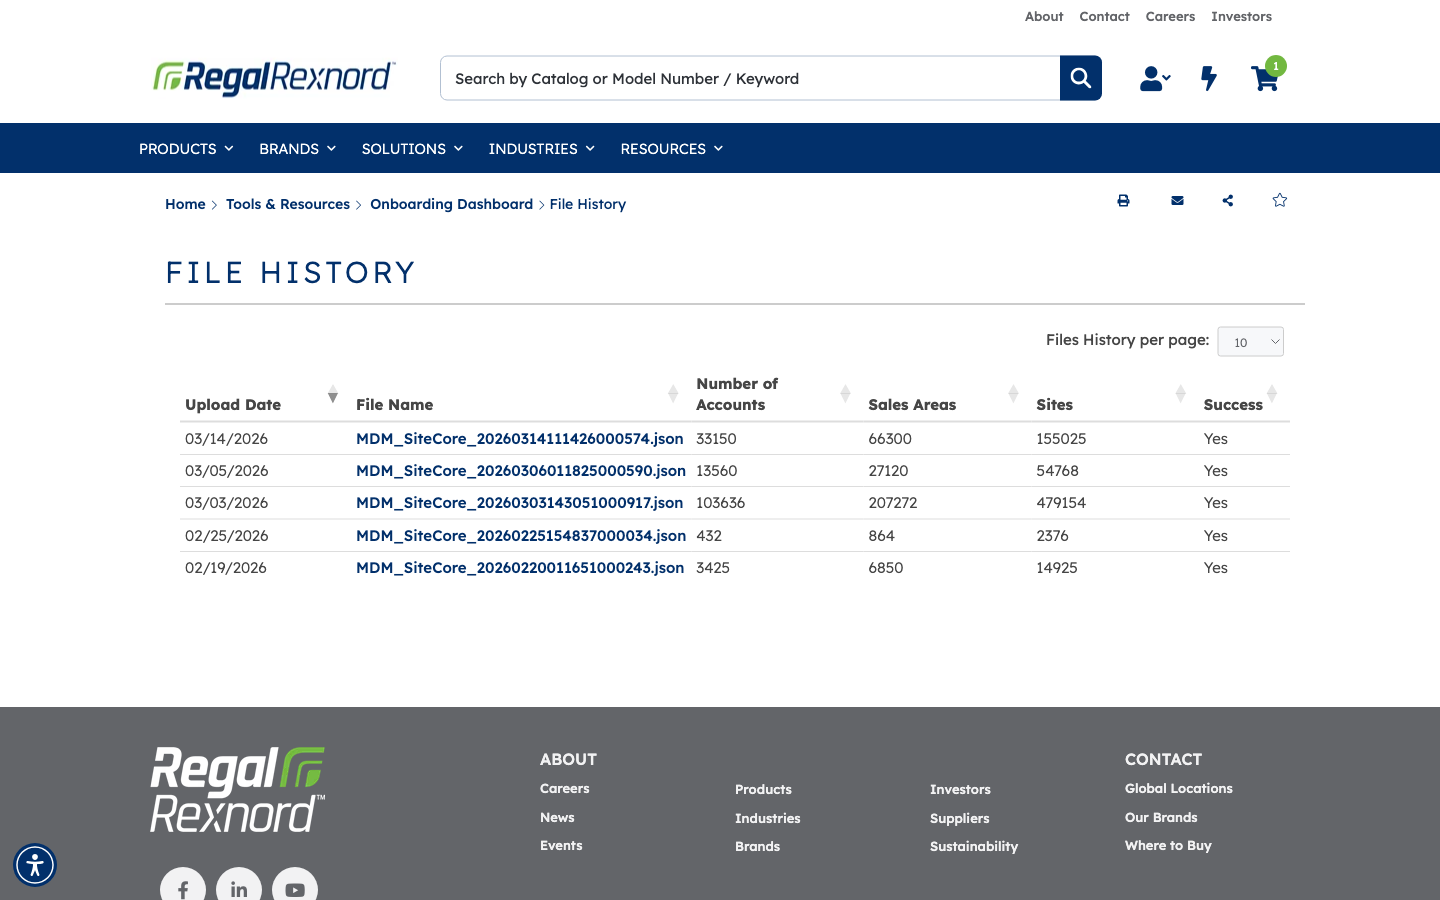
Back on the main dashboard, click File History to see every data file that has been uploaded for onboarding. Each row in the list shows:
| Column | What it tells you |
|---|---|
| Upload Date | When the file arrived |
| File Name | The name of the uploaded file |
| Account Count | How many accounts were in the file |
| Sales Area Count | How many sales areas were included |
| Site Count | How many sites were included |
| Success | Whether the file processed without errors |
Step 6 — Inspect an individual file
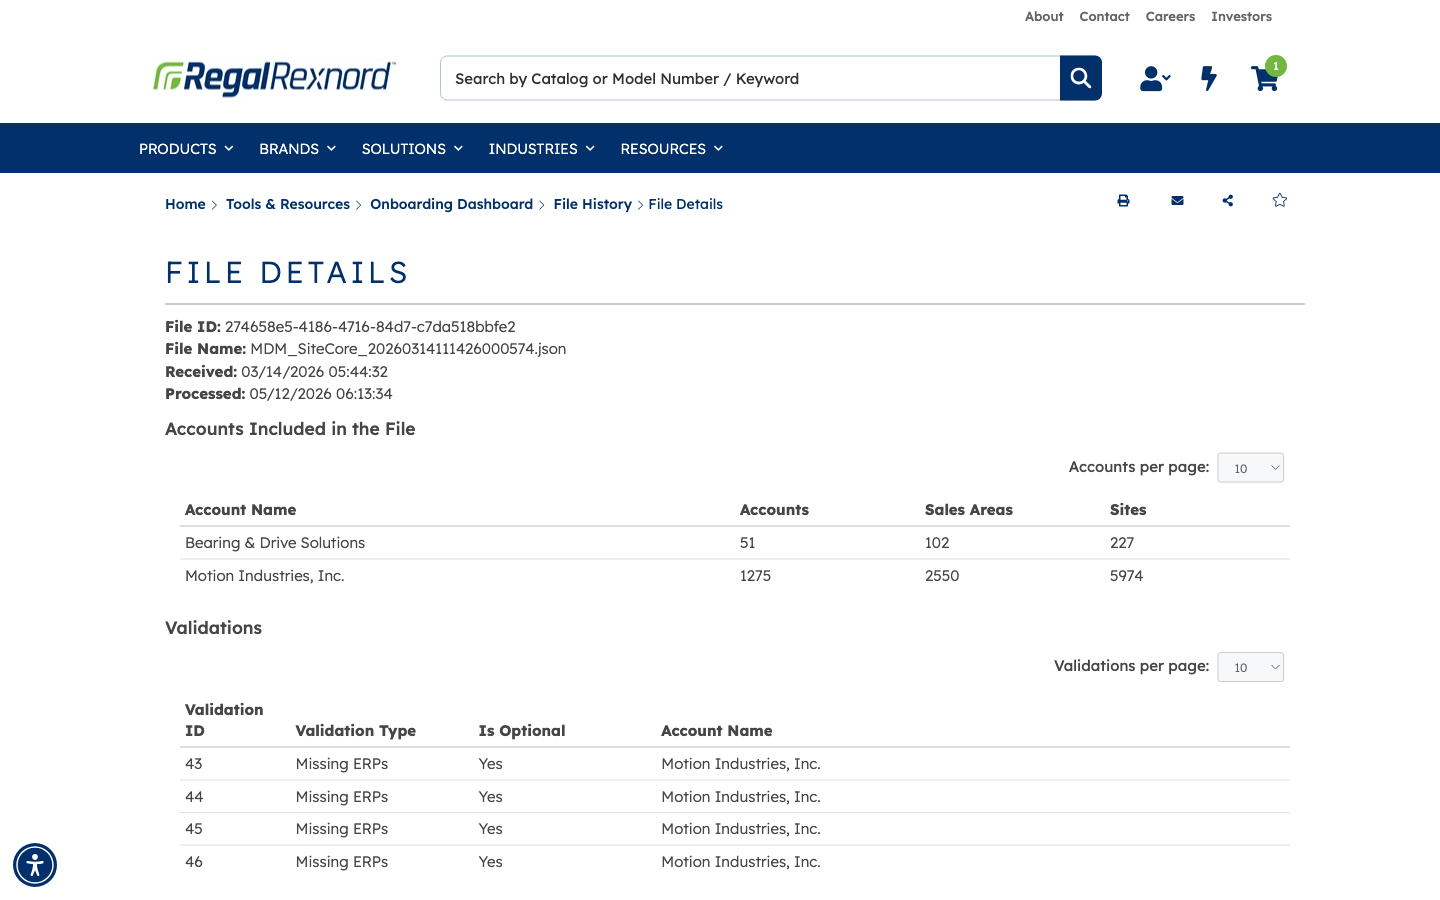
Click a file name to open its detail view. This gives you a full picture of what happened when that file was processed:
- File ID and File Name identify the record.
- Received and Processed timestamps show when the file arrived and when processing finished.
- Account Totals summarise the records loaded.
- Validation Results flag any data issues found during processing.
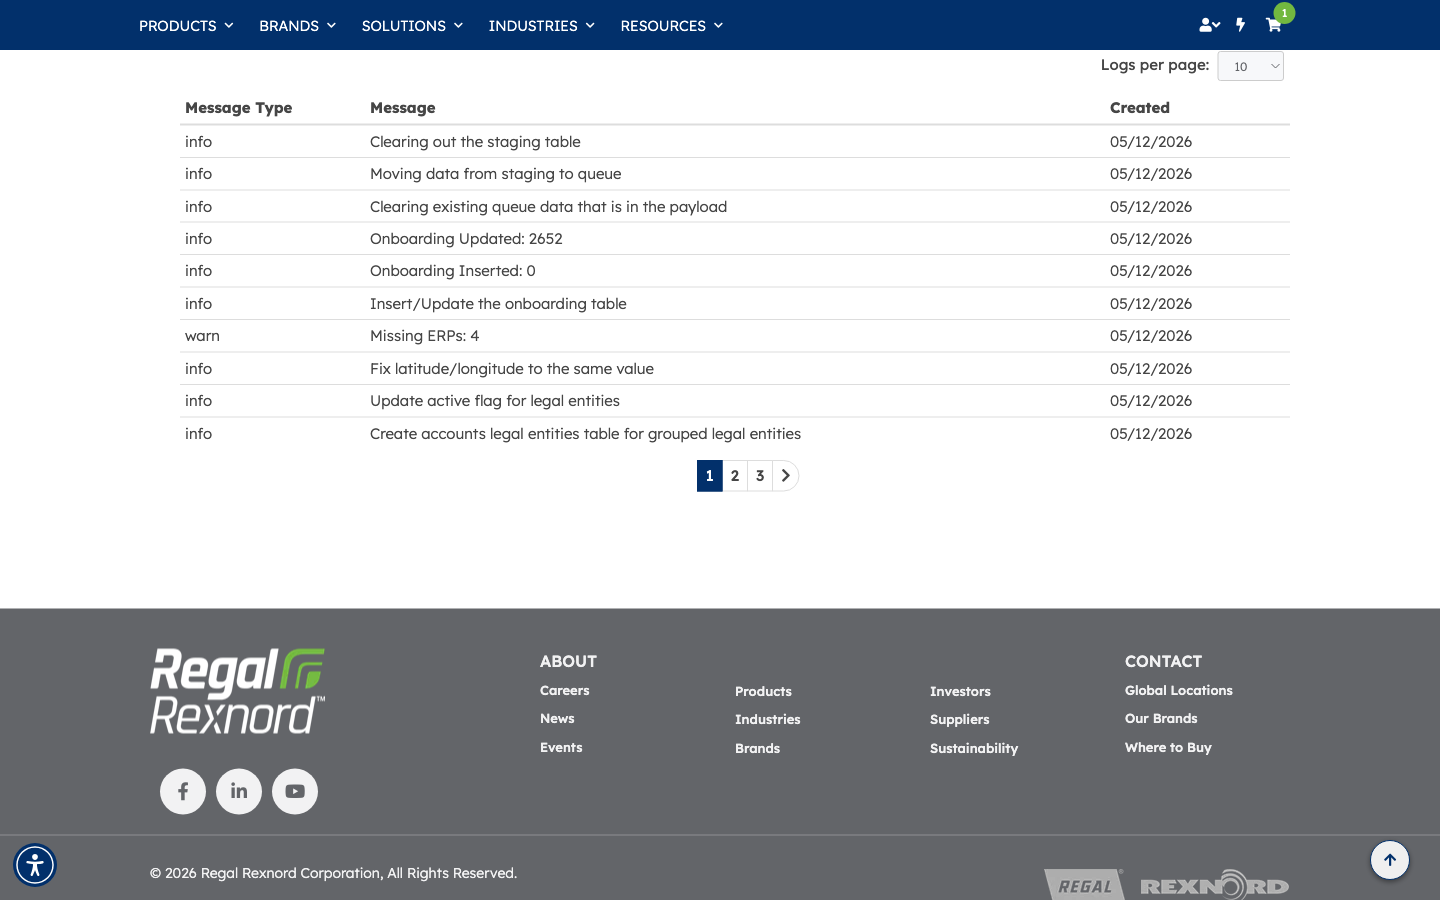
Scroll down to see the full Processing Log — a line-by-line record of what the system did with the file, useful for understanding any discrepancies in your account data.
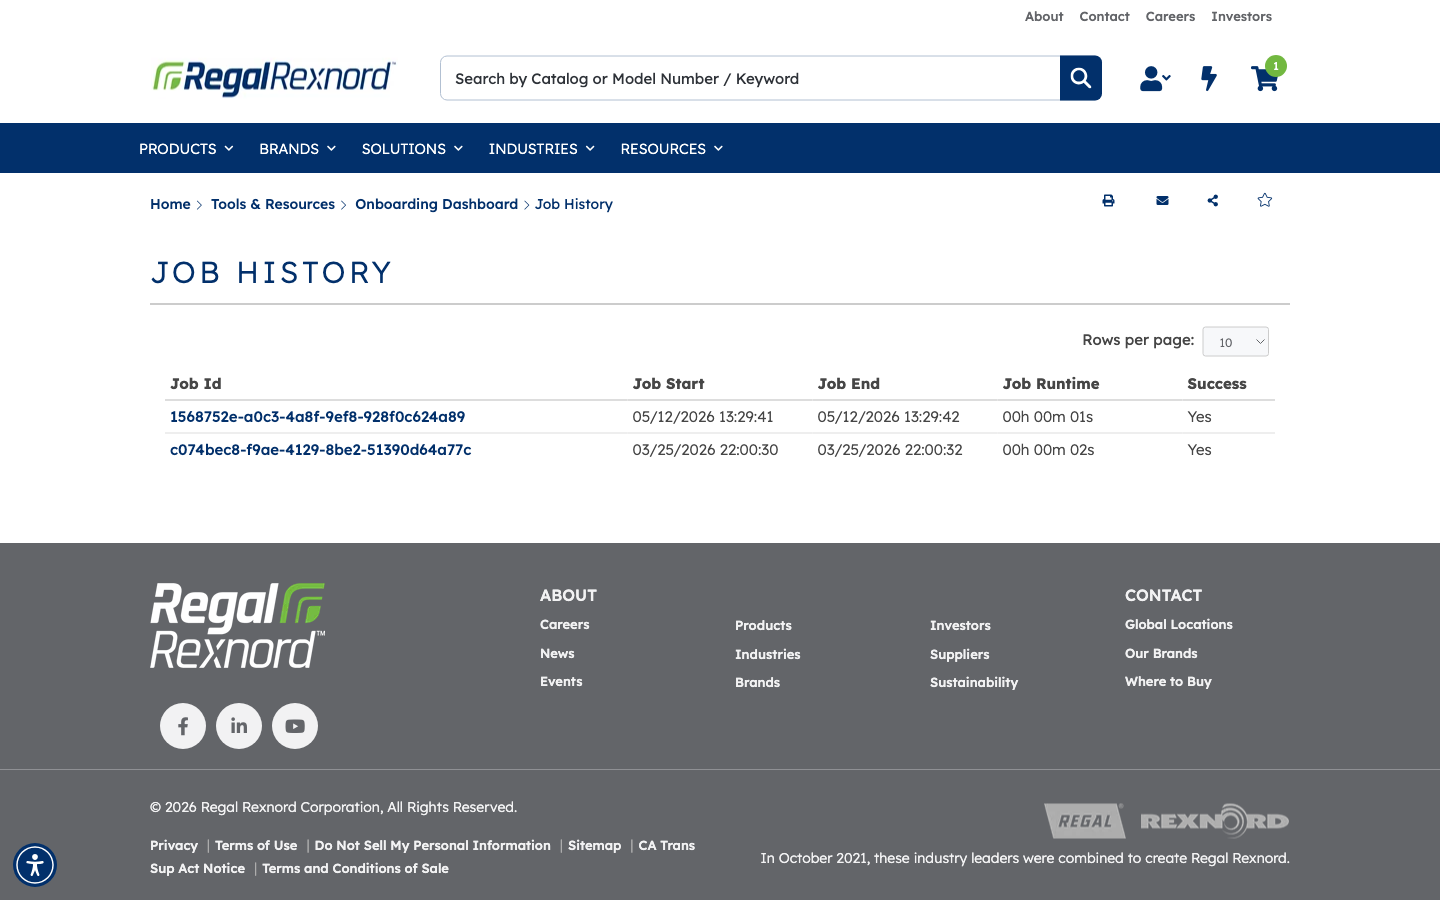
Step 7 — Check Job History
Return to the main dashboard and click Job History to review the processing jobs that have run. Each row shows:
| Column | What it tells you |
|---|---|
| Job ID | A unique identifier for the job |
| Start Time | When the job began |
| End Time | When the job finished |
| Runtime | How long the job took |
| Success | Whether the job completed without errors |
Step 8 — Inspect an individual job
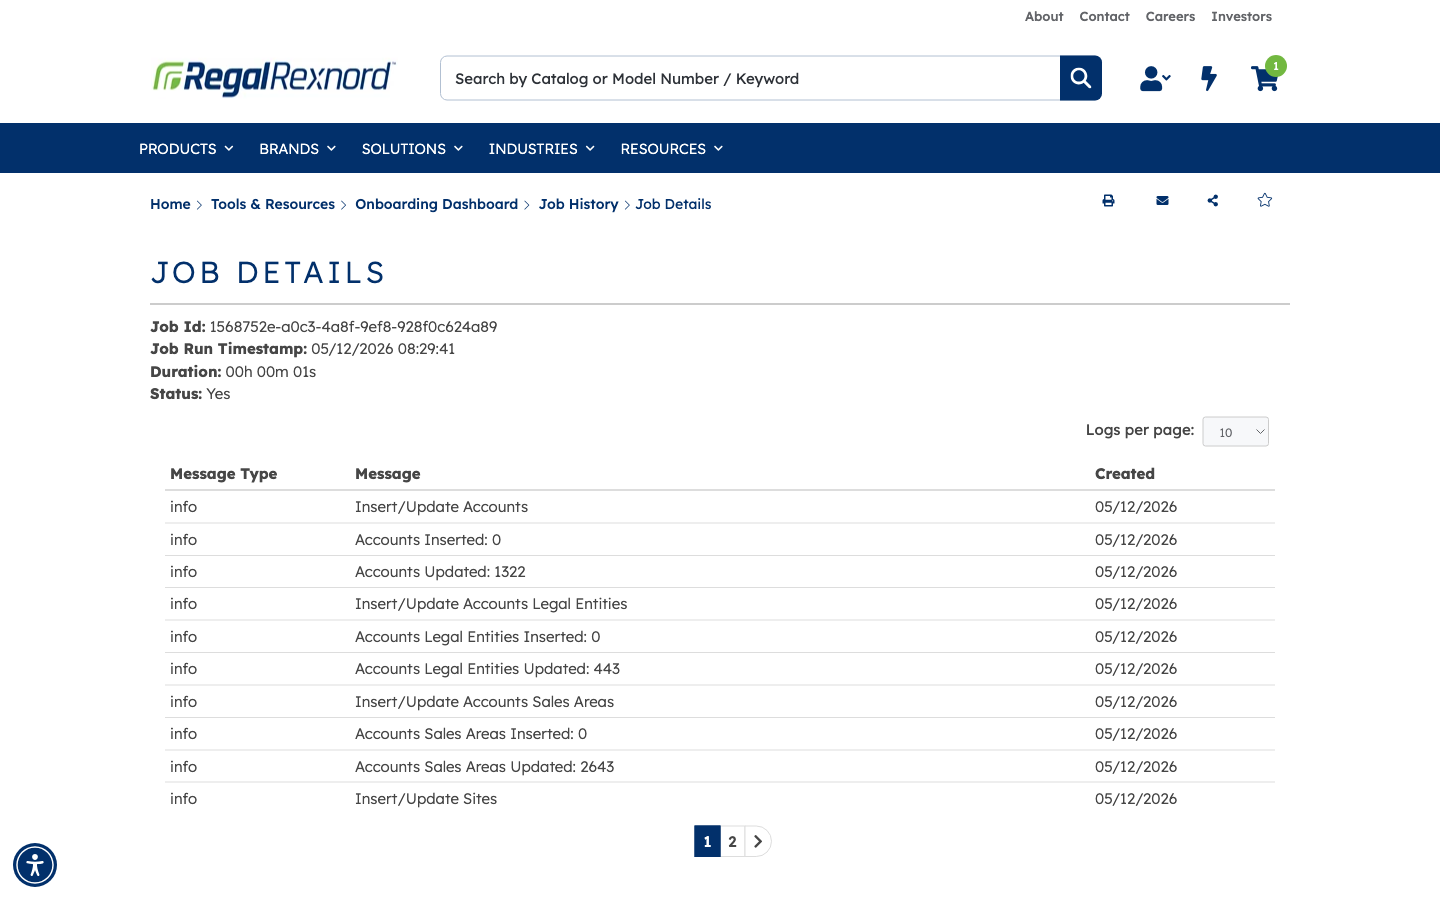
Click a job row to see its full detail: the Job ID, run timestamp, duration, status, and a detailed processing log. This log can help you trace exactly what the job did and identify any accounts that may need attention.
Step 9 — Manage go-live dates
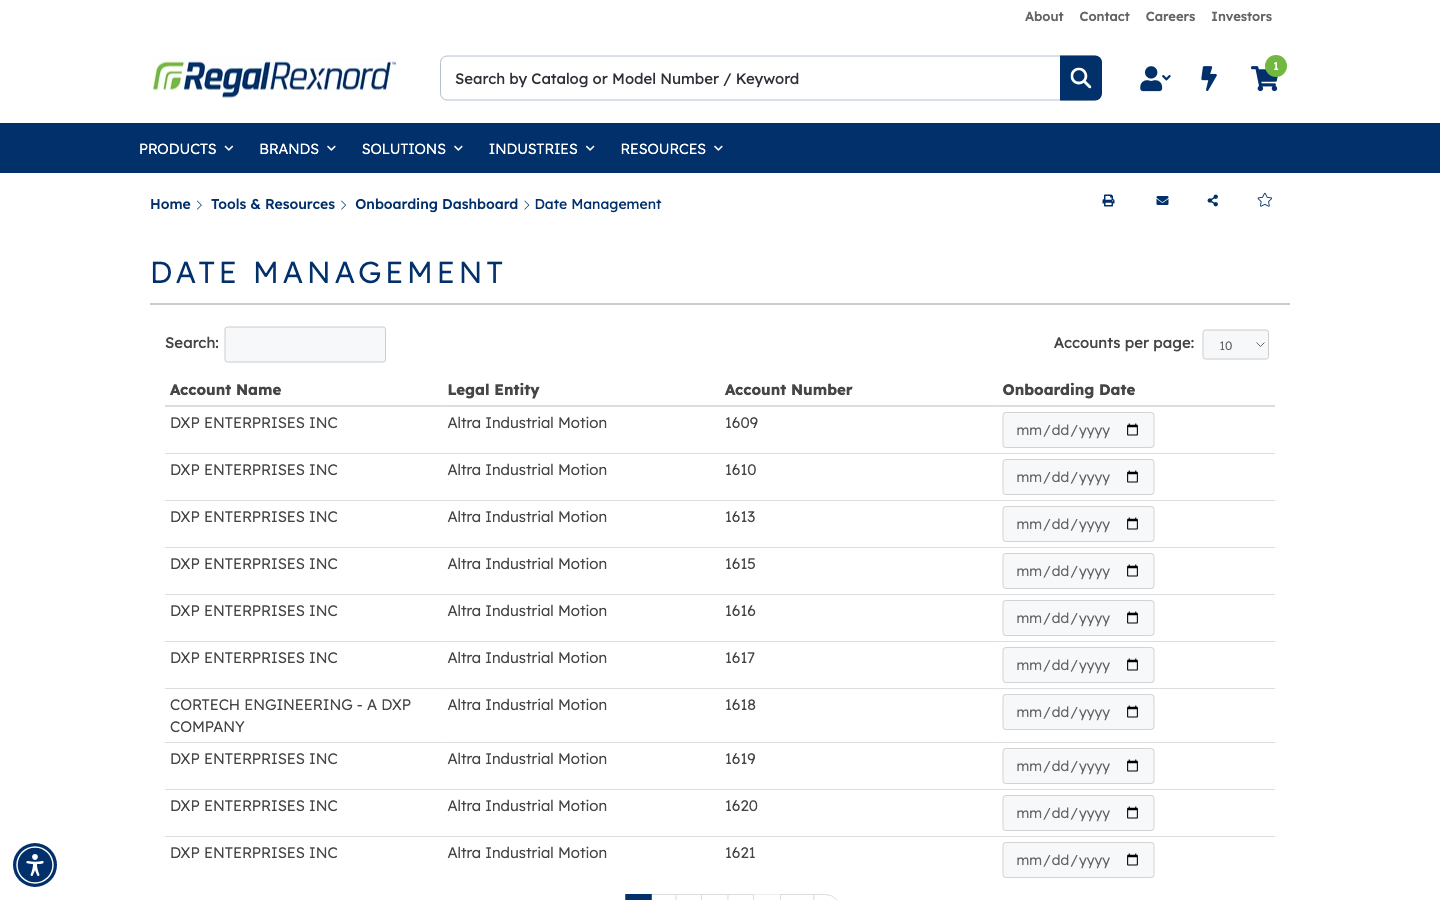
Click Date Management to see the accounts that are pending a go-live date. The table shows each account's Name, Legal Entity, and Account Number, alongside a date-input field where you can enter the planned onboarding date.
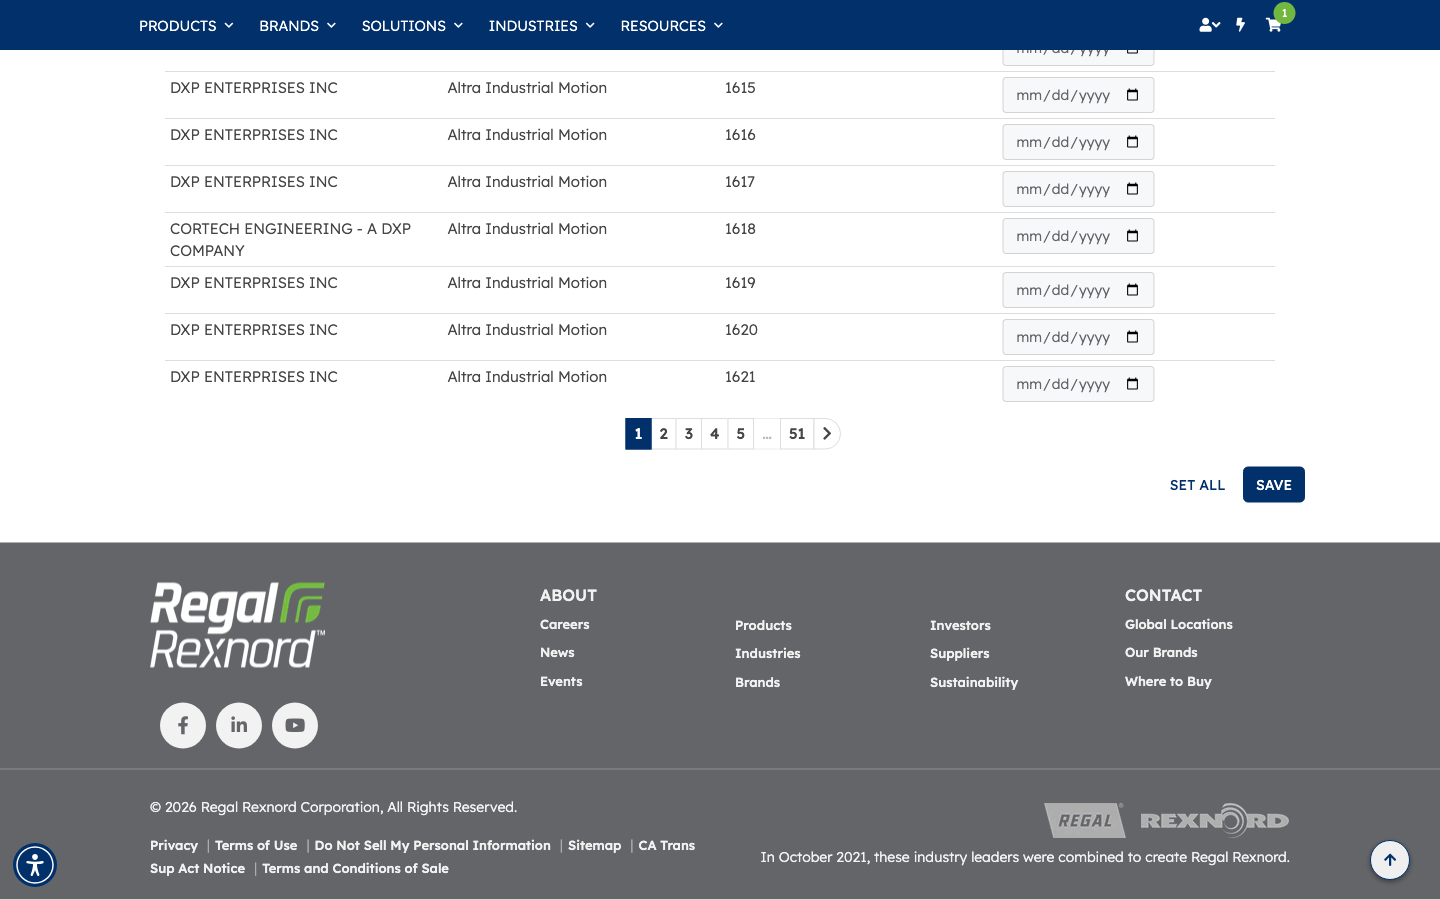
Two controls at the top make it easy to work with multiple accounts at once:
- Set All — applies a single date to every account in the list at once, saving you from entering it row by row.
- Save — commits your date entries. Remember to click Save after making any changes, or your dates will not be recorded.
That's it. You can now navigate every section of the Onboarding Dashboard — monitor pending accounts, trace file uploads and processing jobs, and set go-live dates — all from one central view.