Adding a User to Your Account
Account administrators can give colleagues their own sign-in rather than sharing one. Each person gets a role that decides what they're allowed to do, and access to only the accounts you choose.
You need an administrator role. If Users doesn't appear in the left-hand Account menu, you don't have it — the Finding Your Account Administrator guide shows you who does.
Step 1 — Check whether they're already there
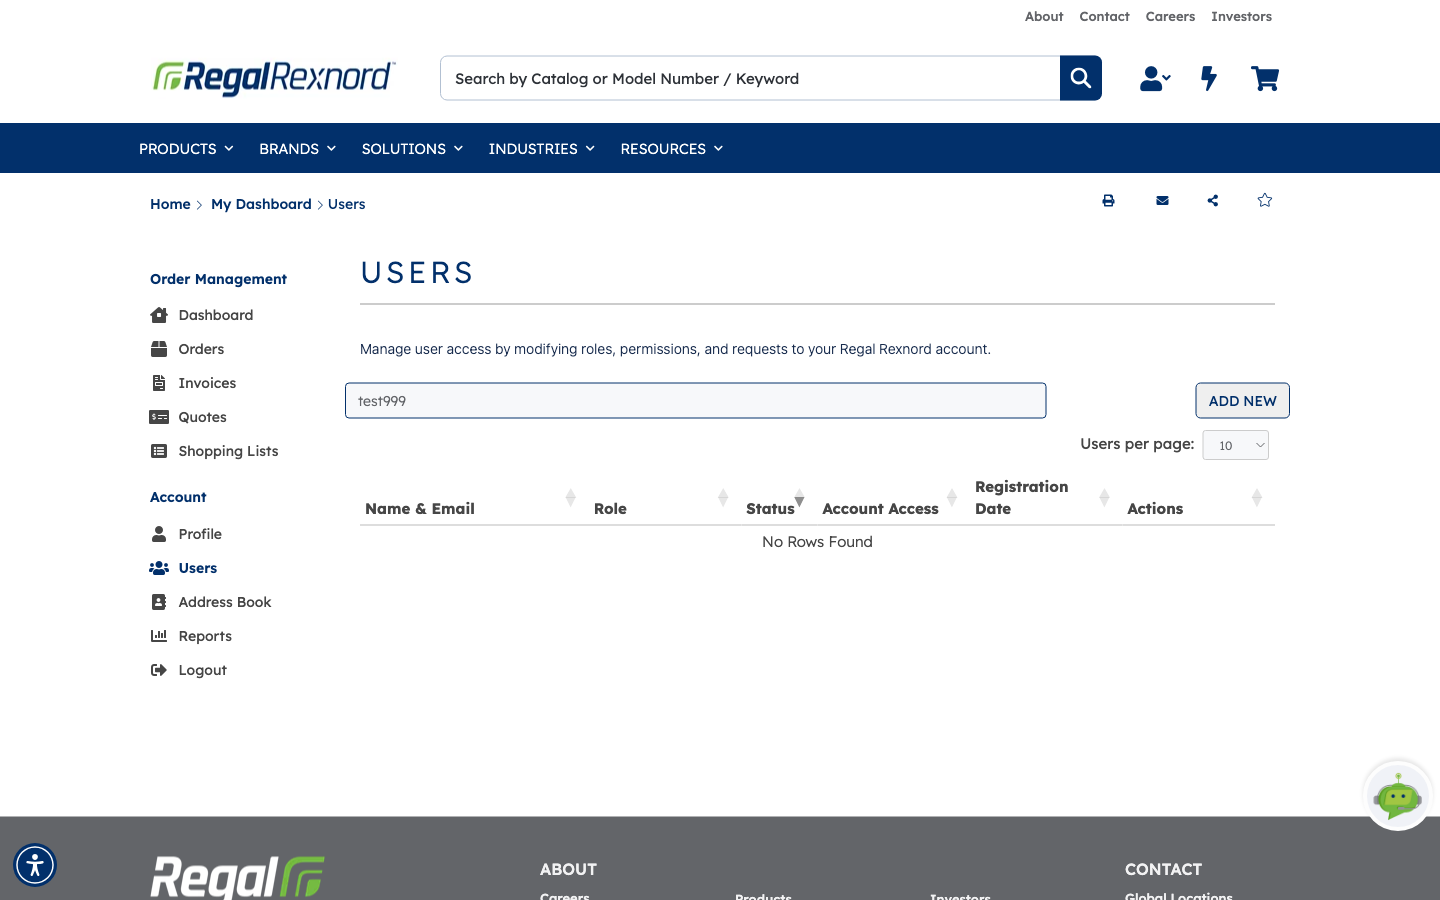
Open Users from the Account menu. The list shows everyone with access to the account you're currently working under:
- Name & Email
- Role — what they can do
- Status — Active, or Pending while they're waiting on approval or verification
- Account Access — which accounts they can use
- Registration Date
- Actions — Approve / Reject for pending requests, Remove for active users
Before adding anyone, type their email into the filter box. It matches on name, email or account number. No Rows Found means they don't have access to this account yet.
Users per page switches between 10, 25, 50 and 100, and every column header sorts.
Step 2 — Fill in the new user
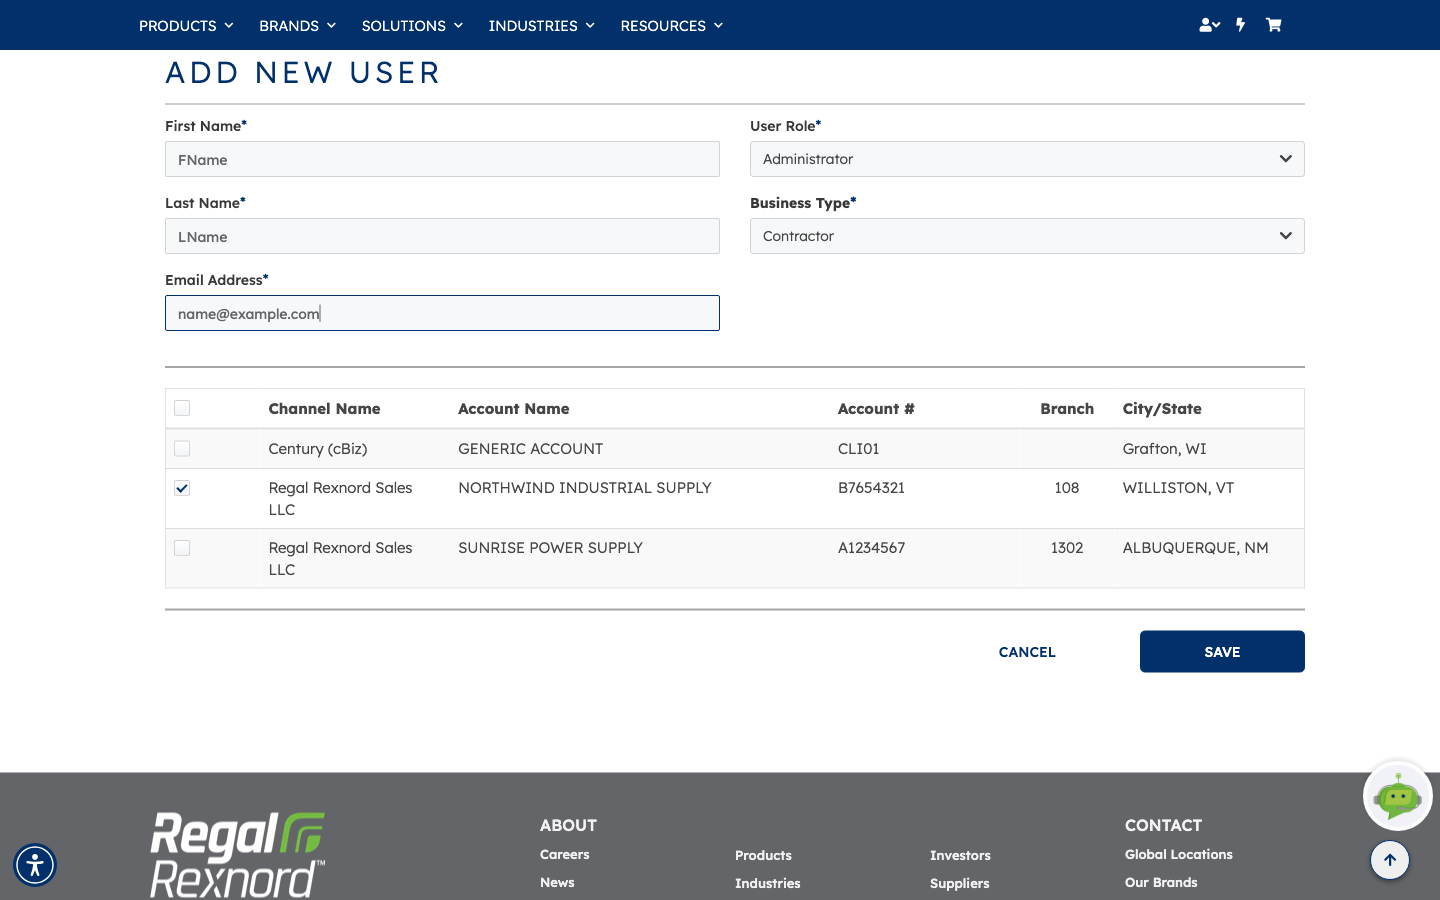
Click ADD NEW. The form is short:
- First Name, Last Name, Email Address — all required. The email is their sign-in and where their verification message goes, so get it right.
- User Role — what they're allowed to do:
- Administrator — full access, including managing other users.
- Account Payable — billing and invoices.
- Buyer — can place orders.
- User - No Checkout — can browse and build carts, but not order. Useful for people who prepare orders for someone else to approve.
- User - availability Only — can check stock and pricing, nothing more.
- Business Type — contractor, distributor, end user, engineering firm, OEM, service provider, system integration, or other.
Then tick the accounts they should have access to in the table at the bottom. It lists every account you administer, with channel, account name, account number, branch and location. Tick as many as apply — access is per account, not all-or-nothing. The checkbox in the header row selects them all at once, if the person genuinely needs every account.
Click SAVE.
Step 3 — They verify their email
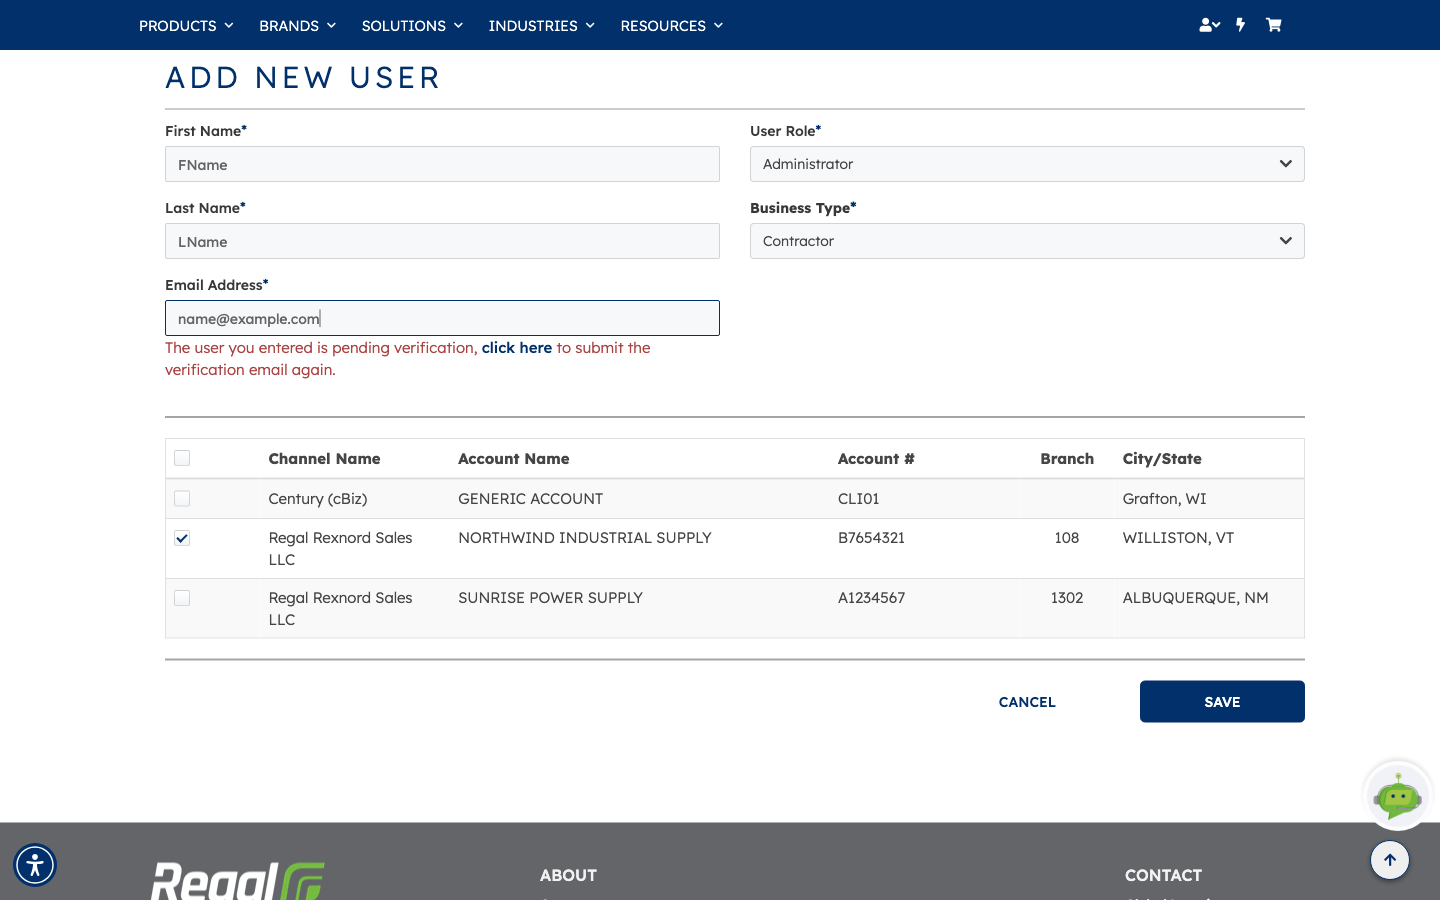
The new user isn't active straight away. The site emails them a verification link, and until they follow it their account stays pending — they won't appear in the Users list yet.
You can confirm this yourself: put the same email back into ADD NEW and the form tells you the user you entered is pending verification, with a click here link that sends the verification email again. Useful when someone says it never arrived, or it expired.
Two other messages you may meet on this form:
- This user already exists, click here to manage it — the email is already registered. The link takes you to their existing record instead of creating a duplicate.
- Pending verification, as above.
Once they've verified, they appear in Users as Active with the role and account access you set, and you can change either from there.
What you've done
You've given a colleague their own sign-in, scoped to the accounts and permissions you chose, without sharing credentials.
Worth remembering
- Filter first. It saves creating a duplicate or discovering they already have access.
- The email address is the sign-in — a typo means the verification never arrives.
- User - No Checkout is the one to reach for when someone should prepare orders but not place them.
- Account access is ticked per account. Only tick what they need.
- New users stay pending until they verify their email, and don't show in the list until then.
- Re-entering the same email is how you resend a verification that went astray.